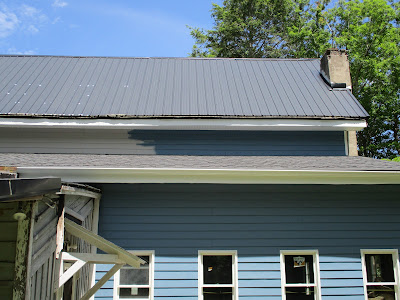
I forgot to post a photo of the house on Christmas. I had lights on it for the holiday season, probably the first time she was lit up in a long while.

Monday, December 30, 2019
Sunday, December 29, 2019
Happy Holidays.
As you might have guessed, it is winter here in Pennsylvania and all work on the house has come to a halt. I did however obtain a nearly new above ground fuel oil tank and a roll of copper fuel line for the house two weeks ago, and I'm just about to pull the trigger on a new boiler as well.
This means that we will potentially have heat in the house and be able to work year round(at least inside) in 2020!
As for today, the only thing I have to share is a pair of then and now photos of the Roebling Bridge.
The older one was taken from the NY side of the Delaware river and you can see the house in the background. The newer photo was taken last month from my front yard.
Sunday, November 3, 2019
This post could have happened weeks ago, but I hesitated and gave it a great deal of thought first. My family and friends said not to mention it to anybody, and initially I thought they were right. However, I decided to take pictures and share what happened last month. I figured that since I did everything correctly and I documented and photographed the procedure, that I may as well show it.
This may help other people who encounter the same thing, and it may save them a few thousand dollars. So, here it is: While digging along the north side of the house's foundation to seal up a porous spot in the stone, Rob and I discovered an old in ground fuel oil tank.
Now, everyone has heard the horror stories about in ground tanks and how they leak and have to be removed by hazardous material crews, and if they have leaked into the ground, that the DEC must be contacted and a costly cleanup will ensue. Well, those were my fears when we first uncovered the tank. I looked online and found examples where this had cost home owners between $2000 - $4000 if the tank did not leak and from $10,000 - $90,000 if it did depending on the scope of contamination!
Dreading the worst, we first stuck a long wooden rod down into the tank to see if it was empty. To my surprise the tank was still holding oil, as it came up wet with red fuel on the first 24 inches of the stick. The first order of measure was to pump it dry. It took two trips, and SIX 55-gallon drums to remove all 300 gallons of fuel from the tank. The fuel was then pumped into my home tank and my sons home tank, we are currently heating our homes for free so far this season. That alone saved me nearly $500 in fuel oil costs.
I then assumed that since the tank had held all that oil for all those years, that it was most likely intact and had not leaked, so I researched a process known as oil tank "abandoning" where the tank remains in the ground, but the top is cut open, the inside is cleaned out and then the tank is filled with sand or gravel. This is the approach I followed but with one small difference, we did not use sand OR gravel to fill it.
Here you can see the tank as we discovered it:
After pumping it dry, I used a reciprocating saw to open the top of the tank:
Rob wiped and cleaned out the inside of the tank using rags and old t-shirts:
Once the inside was clean and dry, I went to home depot and purchased two pallets (84 bags) of concrete (80 lb bags).
Remember a few post ago I showed the cement mixer that was in the kitchen? Well we mixed all the concrete and filled the empty tank:
The reason we filled it with concrete was because we did not want ground water from heavy rains to enter the tank through the soil and fill the tank via porous sand or gravel. With concrete the tank is essentially just a very large rock below the ground now.
Total cost for this tank abandonment project was $680 which includes Robs labor and the cost of the cement mixer which I can use again in future projects.
Sunday, October 20, 2019
Oh well...
The progress at the house has reached the point where all structural issues are completed. 90% of the electrical re-wiring is done, and all compromised exterior siding has been repaired or replaced.
Other than cosmetic concerns (ie. paint, trim, carpet, linoleum floor, etc), the next real big project is to install all new plumbing and a new heating system. This project must originate with re-activating the well so that we have a source for water. This weekend I uncovered the well in the back yard. I must say that I have some concerns and questions.
This is the well:
Upon removing the cover, there is an obvious problem:
The top section of concrete pipe is broken and has been this way for some time. It also sits flush with the surrounding ground rather that rising up out of it ( standing proud of the soil) . I'm pretty sure that wells are supposed to be sealed up and elevated somewhat from the ground so that critters and ground/rain water cannot enter the water supply.
Now, I'm certain that I could easily replace the top section of the concrete pipe with a longer section, but I don't know if the wells water has been tainted or compromised. Furthermore, If you look down into the 24" concrete pipe you will see an approximately 6" diameter pipe or casing which the water pipe and pump wires go down into. see pic below
I'm wondering if the smaller casing pipe is what actually goes down into the water and not the 24" concrete?
Does it matter if the 24" pipe was compromised as long as the smaller pipe was capped off with the blue cap?
How do I know how much voltage I should run to the well pump? Is it 110 volt or 220?
If anyone reading this blog knows, or has a link to a real good water well forum, please comment.
For what it's worth, I stuck my head down into the 24" opening and took a few good sniffs. There is no unpleasant or foul odor in the well.
Fritz.
Monday, September 30, 2019
Bronze Corner Caps for Sink Cabinet
I noticed when the sink was placed onto its new base cabinet that the corners of the cabinet stuck out from the curved corners of the sink.
My solution was to buy some decorative bronze corner caps like this:
Unfortunately when I test fit them this past weekend, they do not sit flush on the sides due to the way the corners of the cabinet are constructed (see first pic with side panel in corner channel)
I guess I'll have some creative grinding/milling to do on those corners first.
Thursday, September 26, 2019
Holy crap! Is that a cement mixer in the kitchen?
Yes, yes it is. After having a great deal of trouble trying to get a concrete company to deliver to my location, I asked Rob if we could mix up a large quantity on site.
Rob's reply was yes, and he recommended the harbor freight model you see here. Apparently he has used this model before and it works just fine. With an online coupon, I picked it up for just $175
You see, we need to mix up and pour about 5 yards on the north side of the house against the stone foundation below the groundline. The stone foundation on that side is quite porous due to the mortar joints deteriorating and rainwater weeps into the basement after a good rain. I figured that after all the structural repair we did, the last thing I need is a damp basement and potential mildew/mold concerns.
Anyway, I know its been a while since the last update, but its tax season. I need to pay the property and school taxes on the house I live in, as well as this house. That doesn't leave a lot of money for renovations, so the work has slowed greatly. Hopefully we can get some progress done before the cold weather hits.
Saturday, August 17, 2019
Now we're cookin.
This morning my son Chris came with me to the house. He hadn't seen the place since he helped me tarp the roof back in 2016 right after I bought it. It has changed quite a bit. 😃
Chris is quite strong so I bought him along to help me get the kitchen stove and sink into position.
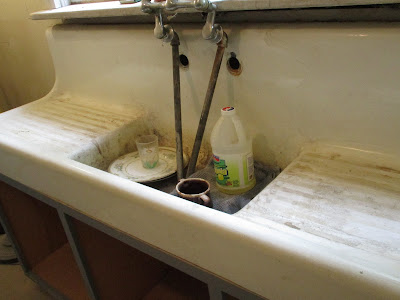
He lifted the sink with ease, and we got it right where we need it. Here's a few photos:
The sink needs a good scrub down with some comet & a sponge. We also have some dishes to do!
Chris is quite strong so I bought him along to help me get the kitchen stove and sink into position.
He lifted the sink with ease, and we got it right where we need it. Here's a few photos:
The sink needs a good scrub down with some comet & a sponge. We also have some dishes to do!
Saturday, July 27, 2019
Well, you'd be surprised just how much surface area a man can reach by foolishly hanging out a window! Thats exactly how I scraped primed and painted around the third floor window today. It's real close now.
Rob replaced some compromised cedar siding in the front of the house above the porch while I was painting. We've got the exterior looking pretty good now. Once we do all the white trim the house will look real sharp.
Rob replaced some compromised cedar siding in the front of the house above the porch while I was painting. We've got the exterior looking pretty good now. Once we do all the white trim the house will look real sharp.
Saturday, July 20, 2019
Siding is done on the North wall (ok the base piece still needs to go in but we must pour concrete there first), and I painted all the new siding plus the parts that were scraped and primed two weeks ago.
I also finished the upper part of the back wall. The house is nearly all blue now, and I can't wait to cover up the last bit of that hideous gray.
Rob hung an old solid door onto the opening for the attic/storage space above the kitchen. He just needs to patch in a piece of sheetrock above the opening.
I think next week we will either finish up the exterior paint or fix the ceiling in the piano room (library). It will all depend on how hot it is outside. It was a scorcher today and we nearly died working in that sun!
Sunday, July 7, 2019
Siding is nearly complete on the north wall. I also did some scraping and priming, but it gets real shaky up on the extension ladder. I'll need a better plan for reaching the 3rd floor level.
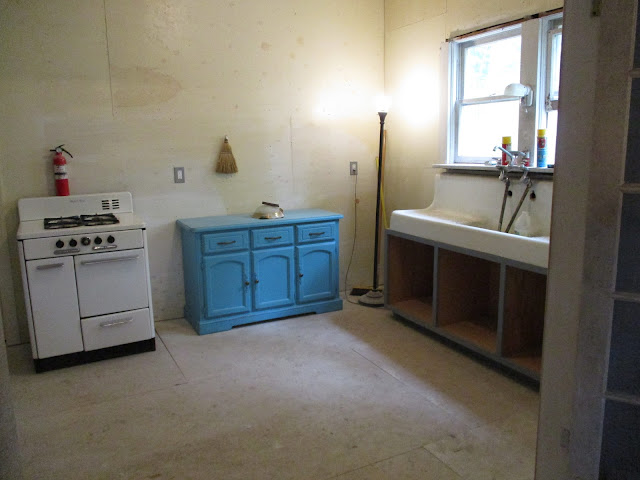
I also got the kitchen furniture to the house and into the kitchen.
The buffet will actually go under the back window once the lower cabinets arrive.
I also got the kitchen furniture to the house and into the kitchen.
The buffet will actually go under the back window once the lower cabinets arrive.
Sunday, June 30, 2019
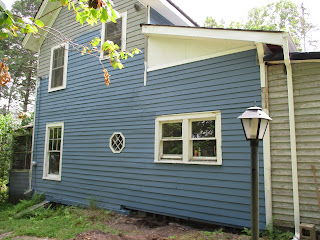
This weekend we turned our attention once again to the exterior of the house. In particular, the North side. While re-building the kitchen last month, Rob & I noticed that we could see daylight through the exterior siding when the plaster walls were down. It was decided to remove the compromised & cracked cedar plank siding and install some plywood sheathing.
After plywood, we installed house wrap and then new siding was installed to match the old stuff. It got real hot in the afternoon, so we will finish next week and then, one year later, we will paint this side once and for all. ( It was July 4th 2018 when I began painting the house blue! )
Here is the before:
During:
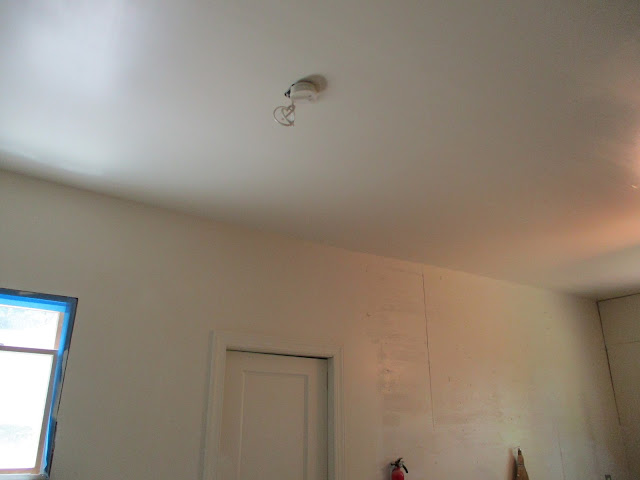
Last week Rob and I finished the kitchen walls & ceiling. Everything was primed, and the first coat of paint went on. Unfortunately, the batteries in my camera died, so no photos were taken.
This week, I finished up the painting. Rob installed the trim moulding, beadboard, and the chair rail. Its all done except for the cabinets going back in, and laying down the linoleum floor.
This week, I finished up the painting. Rob installed the trim moulding, beadboard, and the chair rail. Its all done except for the cabinets going back in, and laying down the linoleum floor.
Sunday, June 16, 2019
New base cabinet for under the sink is done: 1-3/4" birch, 1- 1/4" birch, poplar face frame and doors.
New to me buffet cabinet is also ready for its new home in the kitchen.
I'm thinking about painting the kitchen white with light mint green cabinets and bead board on the walls.
Color-wise I'm liking this color:
New to me buffet cabinet is also ready for its new home in the kitchen.
I'm thinking about painting the kitchen white with light mint green cabinets and bead board on the walls.
Color-wise I'm liking this color:
Saturday, June 15, 2019
Kitchen walls are done, and I began spraying primer on them. The ceiling needs one more sanding session. Next week I should be priming the ceiling and painting the walls. This morning Rob framed out and hung the door which separates the kitchen from the mud room / pantry.
Since I had the paint sprayer out and running, I decided to throw in the leftover can of exterior blue and see how far I could get on the Rear & South walls.
Before & afters:
Two more gallons should be enough to finish the exterior.
Since I had the paint sprayer out and running, I decided to throw in the leftover can of exterior blue and see how far I could get on the Rear & South walls.
Before & afters:
Two more gallons should be enough to finish the exterior.
Subscribe to:
Comments (Atom)


