Thursday, October 27, 2016

     It's quite cold and rainy today and I was thinking about(dreading actually) the upcoming winter. This led to thinking about the springtime and what my big plan is for fixing the roof issue.  It is very clear to me that this house had an addition built onto the back above the kitchen and living room.

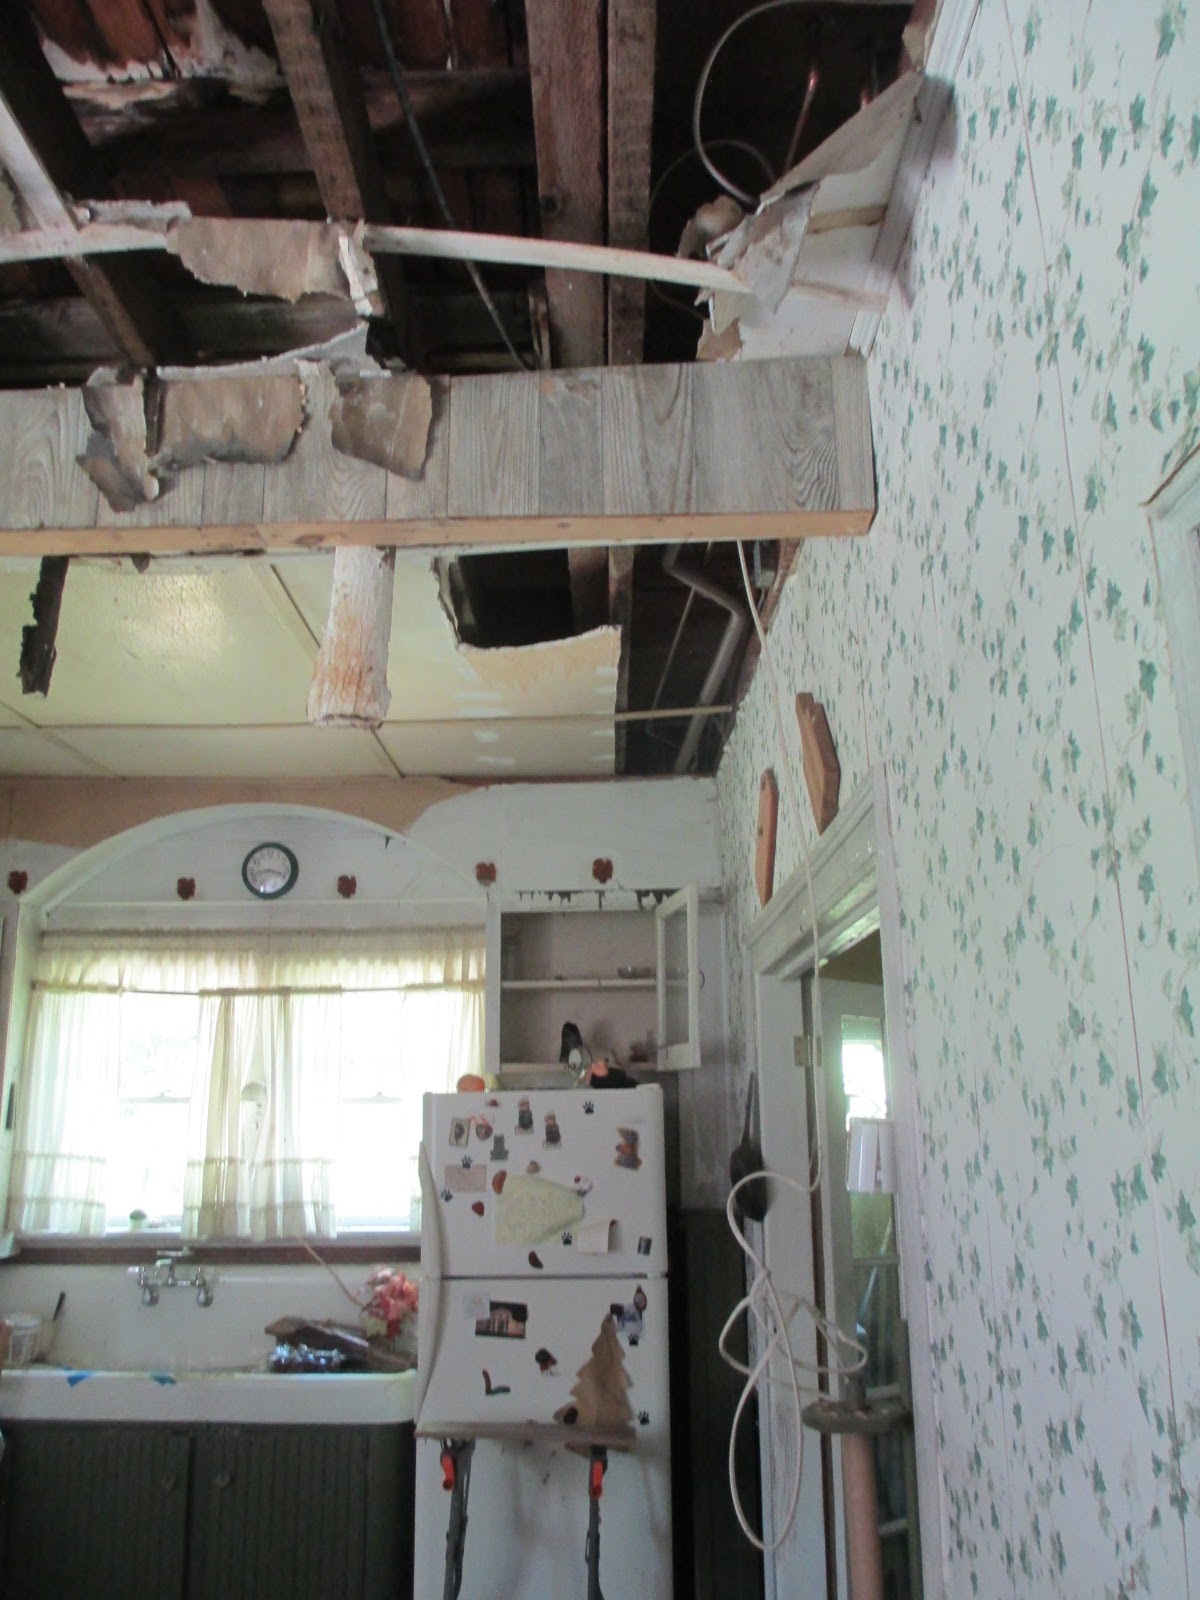
      It was the flat roof on this addition that failed and caused all the water damage in the home. Since the entire roof sheathing & rafters have to come off of the addition,  I think I would rather just lose the addition altogether and build a sloped roof over the kitchen like I believe it had originally.

The addition only contains two very small rooms, a bedroom and a library.  I believe both rooms are only 12' X 10' .  They are just not worth keeping in my opinion.

  In this photo of the south side of the house you can clearly see where the addition is on the second floor:

I propose to remove it and build a roof over the kitchen like this:  (yeah, I know. I suck at photoshop)

Sunday, October 23, 2016

After the staircase to the basement was built, we began to replace all the compromised floor joists in the dining room and hallway.  There were a total of ten beams that needed replacement.  One at a time we squeezed them in and attached them to the quadruple 2 X 10 beam with joist hangers.


Once all the joists are in, a new 3/4" plywood sub-floor will go down and then new hardwood.

Wednesday, October 19, 2016

Interesting side note, I found a couple polaroid photos in the house.  One is a snapshot of the back of the house in 1986.  Notice there are a few pieces of siding that appear to have been recently replaced but not yet painted?


Here it is in 2016, and it appears as though they never got around to painting that siding.  The chimney got replaced, and the mudroom got a roof extension, but those same five pieces of siding remain bare.


Tuesday, October 18, 2016

    See the sign on the door all the way over on the right side of this photo?
It reads: Do not enter - unsafe! 
  

    Let me tell you, if there was one sign in this house that I'm glad I heeded the warning, this was the one!  This was the door that led to the basement stairs...... wait let me rephrase that.  This was the door that once led to the basement stairs.  The basement stairs were a little bit rotted and kinda missing at the top.  Here is what awaited on the other side of that door:


     Rob built a new landing at the doorway, then hand cut some new stringers out of a pair of
treated 2 X 12's  and finally cut a few new treads.  I cant tell you what a pleasure it was to zip up and down them to get to the basement!


Sunday, October 16, 2016

   There were two 4 X 8 floor joists in the basement that originally supported walls above them. One was under the staircase that led from the first floor to the second,  and the other supported the second interior dining room wall(the one without the double glass doors)

  Me and Rob jacked those walls up using the adjustable lally's and then snuck in some new double glued & screwed pressure treated 2 x 8's to hold up the walls.  Rob built a 2 X 6 wall under the new beam beneath the staircase as there was a great deal of weight above it. Seems the first floor staircase supports the other staircase & wall leading up to the 3rd floor.


Next post I'll show the new staircase to the basement.

Sunday, October 9, 2016

With the new dining room wall holding up the 2nd floor, it seemed like a good time to remove the rotted 8" by 8" timber that was under the old dining room wall, as well as the rotted floor joists.

So, with a chainsaw and a dust mask, I had at it.  First section:

Middle section (Hey, what's holding up that wall?):

Last section out and in the back yard. The original floor joists were keyed into the notches in this beam. :
 .
Time to install some new beams & joists in the basement.  Stay tuned.

Monday, October 3, 2016

Back to the kitchen.  After the 2nd floor 4 X 8 support beam had been raised three inches, Rob suggested we hold it there by moving the dining room wall over 10" inches and build it right on top of the brand new beam(the one straddling the cinder block pillars). The new dining room wall will  now serve as a load bearing wall for the 2nd floor. The old wall can be torn down, and the double glass  doors transferred over to the new one.

We mirror imaged the old wall and came up with this :


Sunday, October 2, 2016

Mini update, just because I'm tired.  I wanted to post a recent photo of the front of the house. Someone on the website Old House Dreams mentioned that the dead tree out front looked like the one from the horror movie "The Conjuring".

My wife who is a horror movie fan, laughed like hell when she read that, and agreed with it. Well, I'm glad to report that the conjuring tree is gone. It loomed ominously over the electric and phone lines, and caused a fair amount of grief for the tree service guy who dropped it, but as you can see, all that remains is a conjuring stump.

Before:

After:


Saturday, October 1, 2016

Once the pillars were complete,  I cut out a section of the kitchen floor including  18" inches of all the joists.  The joists are still supported by a stone knee wall that runs under the kitchen, so its quite sturdy yet.

From the basement looking up to the kitchen.


The new beam ready to be lowered into position . In the first photo you an see the rotted 8 X 8 timber to the right .


Finally in place.


Once we had the beam in, we were able to get an adjustable lally column in and crank up on that 2nd floor beam. We got about 18 to 20 turns out of it before the creaking noises above our heads told us to check our measurements.


Turns out we raised the beam & floor upstairs about three full inches. This was deemed to be "sufficiently level"  as not many things are square and level in an average 150 year old home. 


The solution to all the sagging and unsupported floors was to create a new beam that was strong enough to hold up the 1st and 2nd floors while also providing a place to attach floor joists to.
The trick was, we could not remove the existing 8X8 timber as it was still solid on its south end and was supporting the staircase.  It also was built into the stone foundation.

I hired my friend Robbie to help me and we opted to create another beam which would be placed along side the old beam, and slowly we would transfer all the structure from the old to the new.  The new beam was created from four pressure treated 2 X 12's  glued, screwed, and bolted together.  This beam would span twenty feet across and be perched atop two cinderblock pillars constructed on top of 18" deep concrete footings.

Here is a couple of shots of the footings that I poured and the pillars that Rob built:


Among the many problems was the fact that the 2nd floor was sagging, it was low by about four inches toward the rear of the house.  I determined that the problem was due to the fact that the 4" X 8" timber that supported the 2nd floor above the kitchen was itself unsupported.

I imagine that this beam was originally supported by the load bearing wall between the kitchen and dining room, although they do not line up vertically. However, that dining room wall was now sagging into the basement by about 6 inches as the enormous 8" X 8" timber in the basement  that all the floor joists attached to was now rotted and collapsing from water intrusion.

The first floor joist were now unsteady and thus the dining room, hallway, and kitchen floors were  all very soft and had a "floating" or "bouncy" feeling when walked upon.

Here is a photo of the unsupported 4 X 8 beam in the ceiling of the kitchen(the board nailed to it on the right is a true 2 X 4 that measures 2 inches by four inches)  You can see how the dining room wall does not line up under it, it is 10" inches to the right.

 
I  bought an old house in Lackawaxen Pennsylvania this past April(2016). It was a real mess, but it was real cheap too.  I figured I could fix it up slowly over the span of a few years.  I've never blogged anything in my life,  but I didn't really find any online forums that allowed me to document the process and post photos, so here I am.

 The house was built sometime in the late 1800's . My best guess is between 1865 and 1875 based on dated photos of the area from that time frame. (edit spring 2020: Evidence found says the house was built in 1861)  There was an addition built onto the back of the house above the kitchen somewhere in the 1950's.  This addition has a flat roof on it, it is this flat roof that has failed and let water int the home.  Extensive water damage occurred in the first floor hallway, kitchen, and dining room floors as a result.

Here is what she looked like this past spring when I first visited :
Of course that is one of the best looking views of it, some are downright scary! This view of the back shows some of the real bad areas.  I had not closed on the house yet, but the realtor  was nice enough to let me climb up there and tarp the roof  so as to stop more water from coming in.


In June we finally had the closing, and I got this key.  This is where the fun really started! I'll update more in my next post.